
Many artists prefer to do (part of) the audio mixing by themselves. Mixing is a matter of taste and creativity, as well as a technical undertaking. Speaking of the technical aspect, the compressor still remains a bit mysterious to many musicians.
While the compressor is mostly a tool for mixing and mastering, it can have other uses. For example, you can lengthen the sustain of notes on an electric guitar with it.
In this article, I’ll clarify how the compressor works and what its uses are. We’ll start by looking at the workings, after which we’ll review some of the common ways to apply compression.
How does a compressor work?
The compressor is a tool for altering the dynamic response of an audio signal. A good way to visualize what a compressor does is by thinking of it as an automatic robot-arm that adjusts a volume knob, based on the volume of the incoming signal. On louder parts, the (virtual) volume knob is dialed back a little, resulting in a more consistent output volume.
That is the gist of it. Quite simple, no? It will surprise you how many different tasks can be accomplished by applying a ‘simple’ tool like this.
Set the controls..
It’s important to get a good grip on the subtleties of the different controls on a compressor. This way it’s easier to learn how to dial in the right settings for a specific purpose.
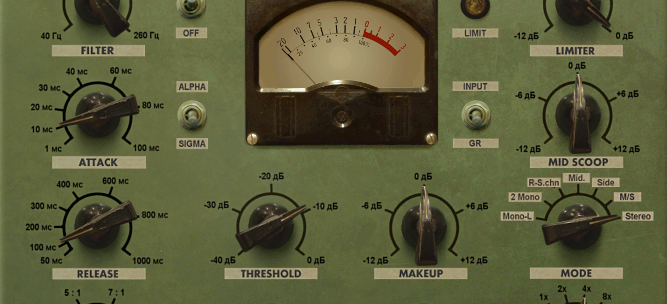
Here are some controls you’ll find on most compressor devices in some form or other: threshold, ratio, attack, decay and make-up volume.

Threshold: The level from which the compressor starts working (automatic volume reduction is applied). The higher the threshold, the less effect the compressor will have on the sound. On some devices the threshold is fixed, and you can control the amount of compression applied via an ‘input gain’ dial.
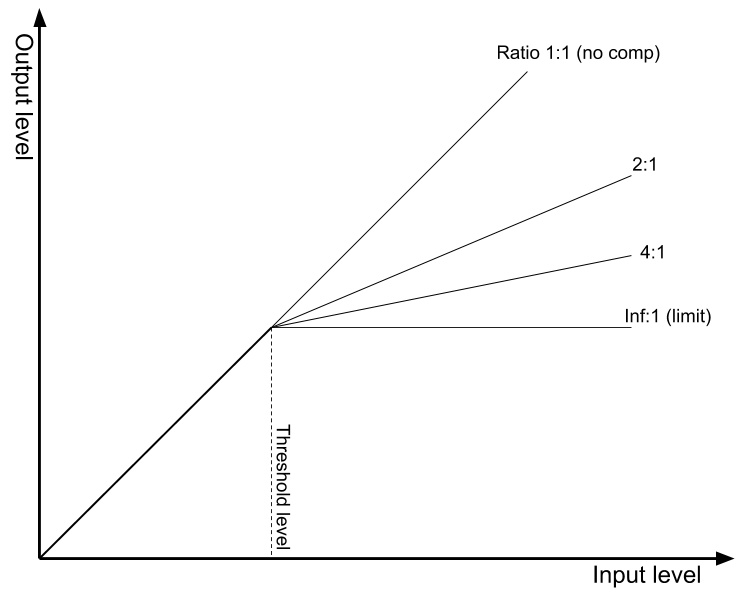
Ratio: The amount of volume reduction that the compressor will apply. 2:1 means that for every 2 dB the signal goes above the threshold, 1 dB of volume reduction is applied. At 1:1, no reduction is applied and the compressor does not affect the signal. At higher ratios (20:1, inf:1, ..) the compressor will start to work as a limiter, which is a special case of a compressor that blocks the signal level at the threshold level.
Attack: This is the time it takes for the compressor to react to the incoming signal. A slow attack lets a bit of the louder signal pass through before volume attenuation starts to work. Set the attack time carefully on percussive instruments, to allow the attack of the sound to come through before the compressor kicks in.
Release: This is the amount of time it takes for the compressor to stop working after the level has fallen back below the threshold. At longer release times, the compressor can exhibit pumping behavior: this means the overall volume stays at a lower level for a small amount of time after a loud sound.
Make-up volume/gain: A simple volume knob after the compressor unit. As the compressor tames louder passages in the signal, you can use this to compensate for the overall resulting volume loss. This way, softer parts in the signal (that are not affected by the compressor) become louder.
(Soft) knee: In the graph above, the compression starts immediately at full effect from the threshold level. The transition can be smoothed out by setting a knee parameter. When set, the compressor starts working a little bit below the threshold and compresses fully at or above the threshold. See the graph below for an illustration.

Some of the many uses of the compressor
You can use a compressor for many different purposes. It is one of the most essential tools for any mixing engineer.
-
- General ‘gain riding’: with a gentle ratio, threshold and some make-up gain, make louder parts a bit softer and vice versa. Great for vocals, bass, guitars etc. that aren’t fully consistent in volume. Set the threshold so that only the louder parts are attenuated.
- Attack-decay adjustment: You can highlight the transients of an instrument by letting the compressor work with some amount of attack time. This will lower the overall volume of the sound except for that first bit of energy, the attack or transient. In a similar way, you can highlight the decay or ‘tail’ of a sound. Set a quick attack and quick decay setting, so that the attack becomes a bit quieter and the decay tail of the sound gets highlighted.
- Drum bus compression: Use above techniques on a (parallel) drum track to highlight the attacks and/or make the sound fuller by boosting the signal between the transients. A higher ratio setting can yield good results in this situation.
- Side-chain compression: Sometimes called ‘ducking’. The side-chain on a compressor is an extra input channel, to allow a different audio signal to control the amount of gain reduction. The main signal passing through the compressor will ‘duck’ to make room for the side-chain signal.
A common example of this is in EDM, when parts of the mix get ‘ducked’ when the kick drum plays. Adjust the release carefully to get a nice rhythmic pumping effect.
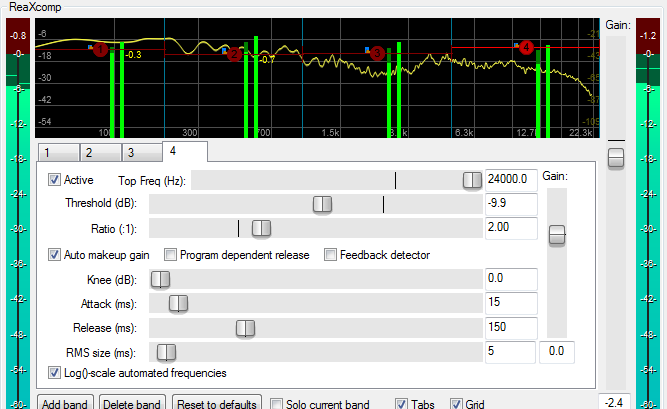
Multiband compression
This special type of compressor first splits the signal into multiple frequency bands. A separate compressor unit is then applied to each band. This type of unit is commonly used on the master bus. But the multiband compressor is a versatile beast, as you can use it for many different purposes.
Example uses:
- Master bus compression: When using a multiband compressor, you can boost the signal while avoiding the pumping effect that can result when using a standard compressor. As each band works independent from the other bands, a more precise balancing of the frequency response curve is possible.
- Taming a specific part of the frequency spectrum: By bypassing all bands except for one, you can adjust the dynamic range for that specific band only. In this manner, you can tame a ‘nasal’ characteristic of a vocal without affecting the overall timbre too much. Or you can tune it as a de-esser to remove overly sibilant sounds without losing clarity. Another example is to use it to get a dynamically consistent low-end in the bass while keeping the original dynamics in the mid-to-high ranges.
- Side-chaining: When side-chaining a certain band, you can make room for other parts that have a lot of energy in that same band. E.g. ducking the low band of the bass whenever the kick drum needs that low-end room. Or clearing up some mid-range in the guitar whenever the vocals are sounding.
So many types of compressor!
Compressors come in various forms, sizes and colors. Why do so many different plugins exist to emulate existing hardware compressors? This is because all of these hardware units have subtle differences in how the compressor works internally, and thus how it sounds.
Traditionally, mixing engineers have preferences for which kind of machine to apply on which kind of signal. To allow you to get a similar coloration like the hardware units, digital emulations are created for most classic hardware units.
The differences in coloration stem from design choices in analog hardware units. They can color the signal because they have an inherent non-linear frequency response curve, acting as a sort of fixed built-in equalizer. They can make the sound thicker because of harmonic distortion which can sound very musical or add a certain thickness or warmth to the signal. Furthermore, the difference in sound can follow from the way the compression envelope acts. Faster, slower, different kinds of attack and release curves etc..
Discussion on all the causes of these differences or when to use which kind of compressor are beyond the scope of this article. As usual, the best way to learn is to try it out and experiment with the different compressor types yourself.
Conclusion
The basic premise of a compressor is less complicated than it may seem. However, learning how to dial in the sound you need isn’t easy. You’ll need to experiment with different settings on different kinds of signals to learn the ropes.
In a previous article, I’ve listed some free plugins you can download to get going quickly. The article has a section on compressors too. Read the article here to see what compressor plugins you can start using today.
Do you have a specific question or remark on the uses and types of compressors? Do you use them for a different application? Leave a message in the comment section below.
Till next time!